The goal of this recipe is to make it as versatile as possible. It has many optional ingredients and instructions that can be included or ignored based off your experience, equipment and ingredients available. This recipe should be capable of making a overall high quality light, medium or dark rum as well as spiced or flavored depending on the flavor profile you are trying to achieve.
Ingredients
Instructions
Tools and equipment
First check that you have all the tools and equipment needed before hand. Some tools are optional but will make the process easier.
Sanitation and sterilization
Be sure you're equipment is clean and sterile. Read about how to clean and sterilize your tools if you haven't yet.
Ready the water
If you use city water you will need to aerate your water prior to pitching your yeast. Chlorine, fluoride and other chemicals added to city water is great for humans, but specifically added to kill yeast and bacteria.
The easy solution is to simply expose the water to air for at minimum 15 minutes, but at least 1 hour is best. Aerating the water will decrease the wait time, and is beneficial to the yeast.
I prepare my water the day before, or at the very least prepare my water as my first step in preparing a new wash to give additional time for the water to be ready.
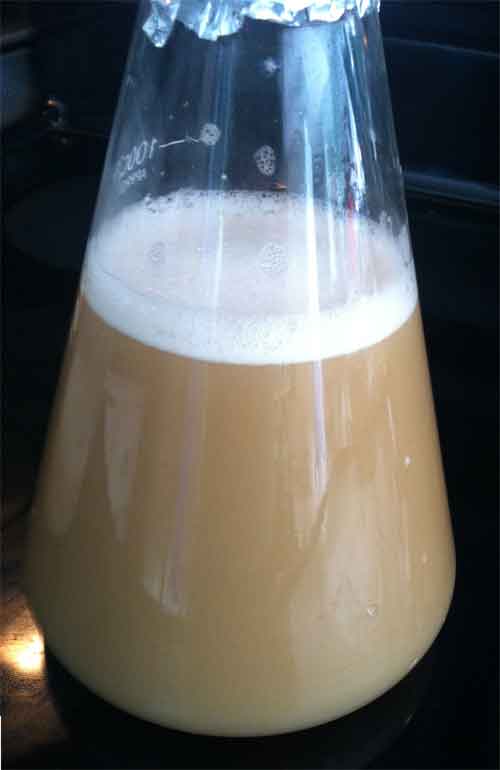
Yeast bomb optional
Preparing your yeast before hand in a small container is a great way to prepare it before pitching.
Yeast bomb is simply preparing your yeast prior to pitching. The idea is to get the population up, have them become acclimated to your water, temp, nutrients and sugars. And because of the small space repopulation is high, and food sources and nutrients are high.
You do not want to pitch everything into your yeast bomb. Simply fill a mason jar (or other container) with 1/2 water. Using tomato paste or yeast nutrients and a table spoon of sugar reseal the jar and shake it up. Pitch your yeast for the batch and leave it uncovered (or use cheese cloth like material). Let this sit for a few hours while you prepare the fest of batch. The longer it sits (as long as they have food) the better it will be.
Yeast continued
Some people choose to continue using their existing yeast from their previous batch. This has the benefits of your yeast being acclimated to the types of sugars you are using as well as saving money on yeast. The downside is you can only use the yeast so many times before (generally 7 to 10 times) before mutations as well as a decreased genetic variation from the yeast strain can begin causing flavor and profile changes.
The other option is to use the yeast from a previous ferment as a nutrient source for your next batch. I prefer to re-use my yeast several times, normally 3 or 4 times, and then using this yeast as nutrients for the next yeast. This way you get the best of both worlds.
Yeast trub optional
Trub is the term for the layer of sediment that builds at the bottom of your fermenter, also referred to as yeast trub. The trub is composed of much of the solid materials that may have been in the fermenter as well as yeast, heavy fats and proteins.
To use trub I find it best to pour the remaining trub out of my fermenter into a much smaller container and let is rack for at minimum a few hours. I then siphon off the top liquids. Next you need to "deactivate" the yeast though high temperatures, normally 150 degrees or higher works.
With this rum recipe you can throw the yeast trub into your pot while heating up your molasses and sugar which saves you some time and cleaning.
Dunderoptional
Dunder (or backset for whiskey) is the remaining liquids left in your boiler after distilling a fermented wash (but not after a final run of stripped runs). Think of dunder as a condensed version of your fermented material. Flavors, oils, fats, etc. that remain behind from distilling are reused, and added to your next fermentation. This will greatly increase the flavor profile of the next run.
One thing to note is that the duner will be very acidic and can greatly lower your PH if you use too much. This is when the use of PH measurements becomes invaluable. Also because of the acidic levels of the dunder you will not need to add lemon juice or acid bled.
Lemon juice (acid blend) optional
Using lemon juice or acid blend is optional. Using acid lowers the PH level of the water. Yeast benefit from a lower PH overall especially if your home or area have high PH levels.
If you are using dunder in this wash you will not need to add acid to adjust the PH.
Molasses (Feed grade)
Be sure the molasses is sulfur free, has no antibiotics, pesticides, preservatives or anti-freeze (normally only in cold climates) added by the manufacturer, or seller. It can be hard to find especially if you live in an urban area. If you cannot find feed grade your options are food grade which is very expensive (10x - 20x more expensive), or powdered molasses, which is cheap but difficult to find and may require online shipping.
Your molasses will have the most effect on your rum, and depending the amount used will be one of the main factors of making a light, medium (gold) or dark rum when it comes to flavor (not color). Molasses is naturally rich in nutrients, but it is still a good idea to use some additional yeast nutrients to get your yeast started quickly.
Rum oils optional
Rum oils are found and easily collected at the very end of your tail run. Many people will discard (or collect for a neutral run) the spirits collected from 50% ABV to around 40% ABV and NOT add this to their rum. The last bit from 40% - 20% is where you will find highly flavorful rum oils.
By collecting these and adding them to the next run (and collecting again) these oils will over time begin to bleed into your hearts and impart their flavors without having to add nasty tasting tails to your rum.
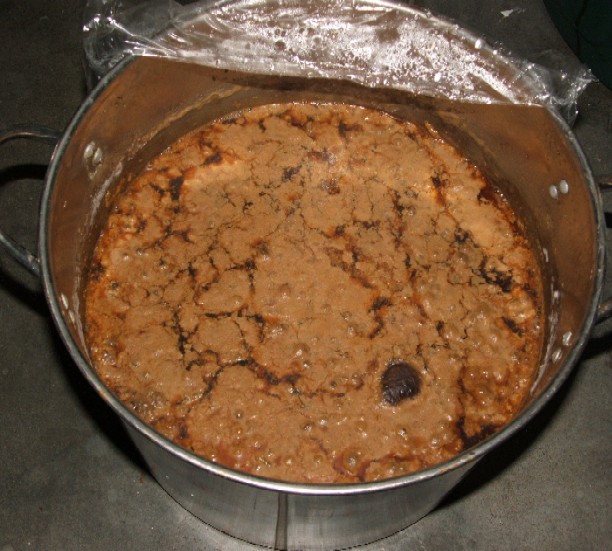
Preparing the ingredients
Most likely your molasses will be too thick to work with so the best approach will be to add it to water and heat it up. But first you need to make a few decisions.
If you plan to use dunder from a previous run you can use this instead of adding any water. I prefer to heat up my dunder so there are no issues of bacteria and no increased lactic acid added to the fermentation. If you decide to not use dunder or it is your first run, just add a few quarts of water to the pot (remember to subtract this amount from your total water required).
This would also be the time to add the yeast trub if you plan on using it. You will need to raise the heat to around 150 degrees (no need to boil).
Finally depending on how large of a wash I am making I also add some, or all of the sugar at this point. The sugars will be inverted from the process slightly (or more depending on how long you keep it on heat) so it is an extra benefit, and gives you something to do.
Start the fermenting
Fill your fermented with only part of your water, roughly 75%. This is to allow for the addition of extra sugar if needed. Begin adding your ingredients. Sugar, molasses, dunder and any of the additional optional ingredients.
Start mixing all the ingredients together and make sure the sugar is totally dissolved. Using your hydrometer take a reading to make sure you’re near your planned gravity rating. If the gravity rating is too low then add additional sugar. If not add the remaining water until the fermenter is filled and the desired gravity rating is reached. Make sure to write this number down.
Finally add your yeast to the fermenter and place your air lock.
Fermenting
Once your wash is setup you should start to see activity within a few hours to 24 hours. This will depend on the amount of yeast used, if you did a yeast starter and the head space in your fermenter.
The amount of time will totally depend on how much yeast was used, temperatures and how much sugar was used. As long as you used the suggested amount of yeast, and temperatures stay consistent and near optimal you will be looking at a great fermenting time. The amount of time though will depend on the percent of sugar used. A 10% ABV wash should take about 5 – 10 days. While a 15% ABV wash can take 14 – 20 days.
The fermentation is done once your hydrometer reads between 1.000 and 0.990. If you do not have a hydrometer (you really should) you can tell by the activity of your air lock. This is not an accurate measurement since it is the release of CO2 produced by the yeast and CO2 will be suspended in your wash long after your yeast stop generating it. Tasting the wash is another test. If it is sweet then chances are all the sugars have not been consumed.
If your yeast activity has stopped or slowed considerably early on or if your wash still takes heavily of sugar, then chances are good something went wrong. You can read diagnosing and solutions section or ask your questions on the /r/firewater sub on reddit.com.
Distilling the wash
Once fermentation has finished you can now run the wash. Using a siphon remove the wash from the fermenter without disrupting the trub at the bottom of the fermenter. Move the siphoned wash to your boiler, and move the trub to a storage container which can be used in your next run as yeast or nutrients.
If you are using a potstill you should be fine. I prefer to add 2 scrubbers to my column to add a bit of reflux. If you are using a boka then no scrubbers are needed and no reflux is required. If you are using a plated system then run it without your dephlegmator. Rum is a highly flavored spirit so you do not want to achieve a pure neutral spirit.
If you have any rum oils now is the time to add them to your boiler.
If you are not doing a stripping run then you will want to run your still slow and monitor temperatures You will need to collect the first 50ml – 200ml depending on the size of the wash, and the ABV. These are your forshots and should not be consumed or used in spirits. Discard it or use it for cleaning, solvents, but do not drink.
Next you will need to start collecting cuts; with the first cuts being the heads which can be discarded, or saved and run in a neutral run later on. The amount depends on the size of wash, yeast used or stress and the alcohol content. The heads will taste and smell sweet from the Ethyl acetate. Once this sweetness decreases you’ll be entering your hearts which you want to save.
Collect down to 50% as your hearts. The next portion you can save for a neutral run or toss but don’t add it to your collections. Collect until you reach 40% ABV. From 40% to 20% you want to collect these as your rum oils. These should be collected and saved to be used in your next still run. As you collect and add these to your runs they will in time bleed into your hearts increasing in overall flavor.
Finally label and store your cuts. Some people cover the collections with cheese cloth, coffee filters, paper towels, etc. so the collections can aerate for 24 – 48 hours so less volatile alcohols evaporate.
If you will be doing a stripping run you can run your still hot and fast and not worry about cuts or temp monitoring. Start off by removing the first 50ml – 200ml (depending on still size, ABV of wash) and start collecting without worrying about cuts and collect down to 20% ABV. Collecting down to 20% is important if you want to collect the “rum oils” that have tons of flavor you’ll want carried over in the final product.
For your final run follow the process above for a non-stripping run, doing cuts, removing heads and rum oils.
Aging and flavoring
For specific flavoring and aging recipes please see our other rum recipes. All recipes follow this recipe for the rum, and only vary based off ingredients used for flavoring and aging processes.
Additional information
When transferring to your boiler it is beneficial to use a siphon. Boiling the yeast and the solid material from the molasses can add unwanted flavoring to your final product or these components can get burned and making cleaning time consuming. When siphoning keep the siphon about 2 inches from the bottom (or further if not using a proper siphoning tool).
For an optimal run it will be beneficial to siphon down to the last 2 or 3 inches if using a proper siphoning tool. Rack this last two inches into a secondary container. Using a small 1 gallon container works well as you can place this in the fridge to help separate the yeast. Wait several hours for this to separate and siphon off the remaining wash or save it to use in your next run. The yeast can be reused in your next run, or converted into yeast trub.
Yeast trub (the sediment at the bottom of the fermenter) can be re-used several times in fermenting or it can be converted into a yeast nutrient. See the yeast trub section above for more details.
The highest costs for rum for many people will be the molasses. In some countries molasses can be very inexpensive, but in the US and Europe it can be difficult to find feed grade molasses that is safe to use and not expensive. Some people may decide to go with food grade molasses which gets very expensive very fast, or dried molasses which can be difficult to find but costs less than food grade store bought molasses.
Brown sugar generally costs twice as much or more as white sugar, so always check the prices in your grocery store to see if you can find it while on sale.
Flavoring your rum can start to get expensive depending on the quality of ingredients and quantity. Many people choose to use for example vanilla beans or pure vanilla extract. Personally I go inexpensive and buy imitation vanilla which does the job of flavoring.
Recipe difficulty
The biggest difficulty like cost is the molasses. Finding safe to use feed grade blackstrap molasses can be very difficult. If you’re in a city you may need to research places within a reasonable distance to drive to. Also many stores that sell feed grade molasses simply don’t know the contents of the molasses which can contain preservatives (propionic acid) , anti-freeze components (Propylene glycol) , pesticides, vegetable fats, vitamins or other stuff you don’t want. If you can find it land-o-lakes makes a great and safe feed grade molasses that distillers feel is safe and is often suggested.
The other difficulty with this recipe depends on the many available options such as the use of dunder and rum oils. The most basic use of the recipe is really quite easy but it can start to get more difficult, time consuming and require additional equipment to do well and properly.
Aging
For specific aging and flavoring techniques please see our additional rum recipes. All our rum recipes use this recipe as the base process for the rum and specifically discuss the different flavoring techniques and ingredients.
Overall quality
This is by far my favorite rum recipe. The overall quality of the rum when following just the basic recipe and not including any of the optional steps will turn into a wonderful product once aged and flavored. I cannot say how good the quality is for light rums because personally I’ve never been a fan of light rums. But the quality of the rum after a few weeks of aging on oak and or with flavoring added can be as good as store bought products. My favorite spirit I have made is a spiced rum based off this recipe, and everything who has tasted it have been shocked at the quality.